Sunday, March 31, 2013

Kathryn's Thoughts

Food not Lawns was a group created for our sociology class. As a group we tried to inform people about their options when it comes to gardening. We tried to influence people to grow a garden instead of a lawn. As a group we worked together to make a blog. Everyone had a job to contribute to the project. Our goal was to make people aware of how they can make a garden and save money and eat healthy. Our group, created Facebook groups and a blog with information added every week.

Hi I am Kathryn, and I am one of the “researchers” in the Food not Lawns group. Everyone week I took time to look for interesting information about gardening. Some of the information I found was for beginner gardeners and some of the more advanced gardeners. Other information was fun facts about gardening, for example what grows best in our province and when is the best time for year to grow! I found the information very interesting, before this project I didn’t know very much about gardening but now I have a better understanding.

Saturday, March 30, 2013

Paige's Thoughts

Hey there everyone,

First I would like to thank you folks for following us along our path. We truly do hope that we have inspired some of you to create your very own garden. This started out as a sociology project for our introduction course at St. Thomas University, which soon turned into something bigger. I did not expect to have over 300 views on our blog, nor did I expect to see so many different countries represented in our viewers. For all those interested we have had viewers from Canada, the United States, Germany, Russia, South Korea, the United Kingdom, Vietnam, Argentina, China and even the Czech Republic. I am truly in shock and awe at this.

Our group, like many people now-a-days keeps in touch via Facebook, keeping everyone up to date on what is going on, what needs to be sent to whom, and which of the two bloggers would be charged with the task of insuring the blog was updated each week. We had one person who was in charge of creating a promotional video, three information gathers, two members where admins for the public Facebook page, two people were in charge of creating posters and the final person was our group project manager.

Grow Food Not Lawns is an idea that sparked in Oregon and has since been heard the world over thanks to readers like you and the work that locale chapters have accomplished. With great gardening tips already out there it is easy to see how simple becoming somewhat self sustainable can be. Is it not better to know where your food is coming from? To have the health benefits of growing pesticide free fruits, vegetables and herbs. To grow as a family by planting even one garden bed or to grow as a community by starting a community garden or even sparking the neighbours attention and interest by you having a little garden of your own. The possibilities are endless and I hope you soon discover this for yourselves. Personally as it stands at the moment I do not have a garden, but trust me this summer I will be growing my own herbs on my deck and trying to grow my own vegetables as well. I do not have the greenest thumb but with these great tips located throughout the blog I am certain that even I can spread a little green on this planet. After all we only have one planet to live on and we better take care of it.

My name is Paige and I am the person who is in charge of the blog, the head blogger so to speak. There is also another person helping me out with the blog who you will hear from later on. It has been my job to insure that this blog gets updated on a regular bases, informing our readers what is going on, posting these tips and giving a hand to the other blogger. The layout and design of the blog is also my task, as I was the only one of the eleven of us who knew how to use blogger to begin with. Therefore it made logical sense to place me in charge of it. Three of the group members would send myself or the other blogger a weekly write up, video link or piece of interesting information to be included into the blog. It would be our job to post this information and also to find extra information, links and such to add into the blog. I also created two of the posters that are going to be spread around the city.

Friday, March 29, 2013

Benefits To Gardening

While it can be an opportunity for solitude, gardening can also offer a wide social circle for those seeking like-minded souls. Garden clubs, community gardens, and Master Gardener programs through state extension services all offer a place to connect with others who have a little dirt under their fingernails. Plus there are all the friends you'll make as you share your homegrown bounty.

Some people see a garden as a chore and others see it as a bountiful opportunity for organic, delicious food. In truth, it can be a little bit of both. Still planting a garden produces a long list of benefits with little or no downside.

Physical exertion: Gardening is physical work. Activities such as digging, planting, raking, pruning, weeding, and harvesting provide a physical outlet for the tension we store in our bodies. There’s nothing like a little manual labor to relieve stress.

Sunlight: Gardening exposes you to sunlight and fresh air, both proven mood boosters. It allows you to soak up the vitamin D as well as the light that triggers a happy response in the brain.

Meditation: Anyone who has spent hours weeding the garden understands the meditative quality of the task. Gardening is often repetitive and focused. It offers a quiet space for contemplation. You may feel more clear after time spent in the garden, even if you haven’t been thinking about anything of importance. It allows a space for your brain to take a break.

Perspective: Gardening is an act of hope. We plant seeds and trust that they will grow. Tending to a garden is a way of stepping outside of ourselves and it helps to put things in perspective. Nurturing something outside of ourselves shifts the focus away from self and this can be valuable in times of anxiety and stress.

Thursday, March 28, 2013

Nearing The End

We are nearing the end of our project, from here on out it will mostly be our groups reviews and information about what each of us has done. As I have previously said there are eleven of us who all were assigned tasks within the group. Some of us were in charge of the blog, others the Facebook group (http://www.facebook.com/?ref=logo#!/FoodNotLawnsFrederictonNb), some in charge of the creation of posters, one created the promotional video (http://foodnotlawnsfredericton.blogspot.ca/2013/03/promotional-video.html), others in charge of gathering information to be placed on the blog and our project manager in charge of keeping us all on task.  We hope that our ideas have inspired you folks to look into the Grow Food Not Lawns movement. Now it can be more then just a lawn you rip up to replace with a garden, it can even be asphalt. A rooftop garden, a balcony garden or even the hanging bottle garden. There are so many great ideas out there, from hydroponics to reusing old palates to create a raised garden. The possibilities are endless! We all should know where our food comes from and have the joys of growing it ourselves. We would love to hear feedback from you folks and hope that this blog was helpful to you. We wish you all well and thank you for following us along our journey.

Tuesday, March 26, 2013

Quick and Easy Tips for Planting a Vegetable Garden

Water the spot well.

Lay down several layers of newspaper, no glossy colored papers.

Water again.

Put at least 1 inch of soil on top of the papers.

Plant right in this stuff, digging straight through to the ground. Put your plants in holes that are in the ground. If planting seeds, like beans, make sure you have enough soil on top of the paper.

You shouldn’t have too many weeds your first year because the newspaper is stopping them from growing.

In the fall, after your plants have died, till your garden site.


Easy to Grow Veggies:

Bush Beans Tomatoes Lettuce Zucchini

Radishes Broccoli Beets Onions (plant from onion ‘sets’)

Cucumbers Corn Gourds Pumpkins (need a lot of room)

Monday, March 25, 2013

Sprouts


Growing sprouts is actually a pretty simple process. The sprouting process has to happen in nature without the help of human hands, so it is pretty intuitive overall. ~ Information Source: Young and Raw facebook page- http://www.facebook.com/youngandraw?ref=ts&fref=ts


Step 1: Take your sprouting seed of choice, which could be alfalfa seed, broccoli seed, sunflower seeds, chickpeas, whatever you like, and give them a good wash. You can do this by placing them in a colander or strainer and just washing them under running water. If you are using beans, pick through them to remove any stones.

Step 2: Get yourself a large mason or sprouting jar, or a large bowl. Place 1-2 Tbsp of small seed, or 3-4 tbsp of larger beans in your vessel, and cover well with 4-5 times the volume of water. What you are doing in this stage is rehydrating and activating your seeds, so they need lots of water! Allow them to soak overnight.

Step 3: After your seeds have soaked, drain off the extra water, and then give them another good rinse.

Step 4: Store your sprouts either in a sprouting jar, a mason jar that has mesh covering over the opening, stored upside down, or in a colander over a bowl. If you don't have a mesh covering, you can use cheesecloth or even a nylon to put over the top. Sprouting jars are easily found online or at a health food store.

(The idea is that you want to be able to rinse your seeds several times a day, and then give them time to drain so that they do not end up sitting in a pool of water. They need lots of air flow.)

Step 5: Rinse your sprouts or beans 2-3 times a day. Depending upon your seed of choice, you should have sprouts within about 2-5 days. The sprouting process is much faster in hot/humid climates.

Step 6: Transfer your grown sprouts to a glass container and store them in the fridge and enjoy! Be sure to check your sprouts throughout the process for any molding and store them safely in a cool place once they are ready to eat.

Monday, March 18, 2013

Organic vs. Non-Organic


Fact
Non-Organic Food
Organic Food
Nutrients
 
During processing, non-organic foods lose some nutrients and such nutrients have to be artificially added back to the food.
Organic foods contain more nutrients, that is, a higher amount of minerals and vitamin C.
 
Fertilizers
 
Chemical fertilizers are used to provide nutrients for the growth of crops in conventional farming.
 
Natural fertilizers like green manure and compost are used for the plants and soil in organic farming. If the question is of chemical fertilizers vs organic fertilizers, then chemical fertilizers are obviously more harmful.
Pesticides
 
In conventional farming, there are over 450 pesticides which are permitted for use. Many of these pesticides are toxic.
 
Pesticides are not allowed in organic gardening or farming. In certain cases, they may be allowed but only after considering factors like necessity, effect on human health and environmental health.
Herbicides
 
Herbicides are used in non-organic farming to protect crops from insects and weeds. Herbicides sometimes leave a harmful toxic residue on the plants.
Methods like crop rotation and hand weeding are used instead of herbicides in organic gardening and farming.
 
Sewage Sludge
 
Human waste is used as a fertilizer to grow crops in conventional farming. This contaminated sewage sludge may cause diseases.
Use of sewage sludge is not permitted in organic farming.
 
Irradiation
 
Non organic food is irradiated, to kill harmful bacteria and other microorganisms. Such radiations might cause diseases in human beings.
Irradiation is avoided in organic farming.
 
Nitrate Amount
 
Fertilizers contain nitrate as a common ingredient and this nitrate gets converted to nitrosamines, which may be retained in the food and be cancer causing.
Organic food contains lesser amount of nitrates in it.
 
Genetic Engineering
 
Genetically modified seeds are used in non-organic farming. Such seeds are expensive and difficult for farmers to afford. Such seeds give high yields crops, but such plants may be deficient in nutrients.
Organic farming selects healthy seeds by seed testing.
 
Animal Welfare
 
Animals are given antibiotics against diseases. Intensive farming methods are used to grow chicken quickly and most of the time the animals are kept indoors.
 
Good animal husbandry standards are maintained in organic farming. No antibiotics are used on animals, but homeopathic medicine is used, in case an animal gets sick. If a farmer gives any antibiotic to an animal, he loses the certificate for organic farming. Livestock are handled properly and given a proper diet, and adequate exposure to the outdoors.
Hormones
 
Animals are injected with hormones for stimulating growth, so that they can be sold in the markets.
No hormones are used in organic animal husbandry.
 
Effect on human body
As animals are given antibiotics in conventional farming, human body, when sick does not accept the same antibiotics, thus reducing the body's immunity in the long run. Exposure to pesticides is harmful to humans and especially harmful to women's health.
Organic farming is not permitted to use such harmful chemicals. Thus, when you measure the pros and cons of organic food vs non organic food, organic food is better, as it has lower health risks.

Food Poisoning
There are more chances of food poisoning with conventional farming food products because of the use of chemicals in the form of fertilizers and pesticides.
Possibility of toxic pathogens is very less in organic foods.
 
Environment Pollution
Use of pesticides damages aquatic life. Herbicides and pesticides contain toxic chemicals, which has resulted in lesser number of birds, insects and wild plants on the farmland. Earthworms are essential for good soil health and using pesticides and insecticides reduce earthworm population. This leads to increased dependence of the soil, on pesticides.
Organic farming uses crop rotation to prevent pests, by creating a more diverse ecological system to naturally grow the pest's predators. For increasing the quality of soil, natural manure and composting is done. Thus, the benefits of organic farming are more long term and benefit in fighting problems like degradation of the environment.
 
Soil Erosion
Due to productivity and cropping regimes in conventional farming, there is more soil erosion.
Use of green manure and good topsoil management, prevents soil erosion in organic farming.
Cost
Non organic food contains many hidden cost like taxes and the cost of the treatment for the harm caused to the environment by conventional farming
 
The pros and cons of organic farming show us that organic food is more expensive. But with the number of farmers shifting to organic farming and increased government funding, the prices will come down. Also, organic food has lesser hidden cost.
Appearance
Non organic food is treated many times with preservatives, everything is uniform.
Organic food decays earlier, as there are no preservatives added. Also, it looks similar to non-organic food, but sometimes might have different shapes and color.
Quality Standards
All non-organic food products have the normal quality approval labels on them.
All organic food should have an organic label.
Food Safety
 
Many times harmful preservatives are added to non-organic foods.
Organic foods are safer and better, as they don't use any toxic chemicals.
Availability
If you measure the availability of organic food to non-organic food, mostly it is the latter which is more easily available.
Some organic foods are imported from other countries and therefore, you cannot be assured of the quality of imported organic food.
Number of Consumers
Maximum consumers buy non-organic food, as it is ‘cheaper’ in direct monetary value yet not in the long run (refer to the upper portion of the table) and easily available.
Consumers are shifting towards buying organic foods, with growing awareness
 

 Thanks to http://www.buzzle.com/articles/organic-food-vs-non-organic-food.html for this great table of information.

Saturday, March 16, 2013


Here are some great tips for maintaining your own garden!

1) Have fun- Gardening is a fun and rewarding hobby, but it takes an investment of time and energy.

2) Pick the right location- Is it close to an easy water supply? Is it close to home? How's the drainage? How's the sunlight? A little thought in advance can save you a season of heartache!

3) Timing is important. Except when it isn't- In a lot of climates, you don't want to begin planting too early. But in some climates you can plant stuff year round. A good rule of thumb is that new seedlings like a lot of light, like 12+ hours of light. Know your zone and read your seed packages!

4) Water weekly, water deep- Water once a week, and really water deeply to encourage deep root growth. Use a soaker hose, and water in the early morning.

5) Handle with care- Your plants are fragile - bruised fruit is no fun, and it doesn't keep as long.

6) To each their own- Some plants like to be picked early, some late in the season.

7) Rotate it- So you've gone through a whole year of gardening bliss and are ready for round two. You've got your plans, you know what grew really well in what location, but wait! Not so fast! You should try to rotate where you plant your annuals to prevent disease and keep the soil rich.

If you want some good tips about composting not only garden materials but household items as well follow go to TheGrowSpot.com

Thursday, March 14, 2013

Putting Your Lawn To Use

How to convert your lawn into a thriving, productive garden


So youʼve decided that that sea of green is taking far too much without giving back? Why not make that open space work for you? Converting your lawn into a garden is much easier than you think and for the time and energy you put into maintaining it, you’ll get to see and experience results that are beautiful, rewarding and delicious.
Step 1 - ‘Is my soil safe?’
Before you start to tear out that grass so you can start growing a sea of delicious fruits and vegetables, it’s important to make sure that your soil is safe and free of contaminants. Typically, the most dangerous contaminants folks find in city lots include lead, arsenic and asbestos. If you are at all concerned about the safety of your soil, collect a few samples from around the yard and send them to a soil lab to have them tested. Soil tests have the added benefit of informing you about the character and quality of your soil as well as any possible nutrient deficiencies. If it turns out that your soil is contaminated with pollutants, it is still possible to establish a safe garden. Instead, build raised beds and bring in clean topsoil or compost. A raised bed is simply a frame or perimeter wall built out of wood, stone, cement blocks (whatever you can think of) that retains the soil you bring in, keeping it from spilling out. Either way, once you’ve gotten the results from your soil tests back, you can begin to select and prepare your new garden site.
Step 2 - ‘Where should I put the garden?’
Well, it depends. First, make sure that you choose a location that gets plenty of sunlight. Observe your yard at various times of day throughout the growing season - take note of the areas that remain largely shade-free. Because the sun’s path is located to our south for the majority of the year, it’s best to start by looking at sites south of any large buildings or obstructions. By nestling your garden up against a building or wall, it’s possible to make use of localized ‘micro-climates’. These areas are noticeably warmer than the surrounding environment due to their site-specific location. If you’ve ever leaned against a brick wall that’s been soaking up the hot summer sun, you’ve experienced a micro-climate first hand. It’s also important to consider the relationship of your garden to your home. If you’ll be visiting your garden daily, it makes a lot more sense to site it conveniently close to your house. Check to see where you have access to water - will a hose easily reach?
Step 3 - ‘Get rid of that lawn and prepare your garden’
Here we have a number of choices, some better than others (in my humble o., we’ve saved the best, sheet mulching, for last). Grasses are incredibly persistent, so it will take time and effort to outcompete them. But remember, once you’ve gained control of your new garden site, you choose which plants grow where. Because we plan to use this grass-free space to grow food (and because it’s responsible to avoid poisoning wildlife, children and groundwater with chemicals) we’ll be focusing on organic grass removal strategies. Ok, so here goes:
Solarizing - Though not the fastest or most natural technique, covering your garden site with a layer of heavy plastic will act to burn and suffocate the unwanted plants beneath. It will take a full year or more before the grass has been completely killed off, but once it is done, you should have a clean, weed free bed, ready for planting.
Tilling - Aggressive and destructive to soil structure, rototilling will rapidly prepare a new garden bed. It is a very effective way to mechanically incorporate minerals and fertility into depleted soils. Note: certain weedy grass varieties will resprout from root fragments created by tillage, potentially causing a persistent weed problem.
Sod Removal - Though typically very energy intensive, the physical removal of sod from your yard produces immediate results, ready for garden establishment. There are two primary ways you can do this - by hand using a hoe or spade, or by machine with a sod cutter. If you are only converting a small area, it is likely to be more cost-effective to work manually. Use a garden spade or shovel to cut squares of sod, then skim them from the soil’s surface, exposing bare soil. This is very hard work but once again yields quick results. Take care not to remove too much soil as it is the soil’s upper layers where most of the nutrients and fertility are found. If you have a larger area to work, it may make sense to rent a sod cutter. This is a walk-behind machine that enables the user to set the depth of cut and will quickly and noisily skim beneath grass roots, severing the sod from the soil below. They typically cost around $50 per day from a machine rental outlet, though without access to a pickup truck it will be difficult to transport it home. After traversing your new garden with the sod cutter, follow behind, rolling up the layers of sod. You can save it to plant in an area where you’d like grass (heaven forbid) or mound it up in a pile, grass side down and allow it to compost for a year or two, after which you’ll be left with rich crumbly topsoil you can use to topdress your garden. This brings us to our final, and in my mind, best, grass removal strategy.
Sheet mulching. Sometimes referred to as ‘lasagna gardening’, sheet mulching is a garden establishment technique where the gardener lays down multiple layers of organic materials (usually 1’+ thick), choking out the unwanted grass and composting it in place. It also works to feed and cultivate healthy soil life, improve soil structure, reduce weed regrowth and maintain a cool, moist soil bed. Sheet mulching is less physically demanding than sod removal, and acts to build up soil over time in contrast to tillage which provides a rapid, short-lived burst of fertility to plants. It should be noted though that sheet mulching requires large quantities of organic matter (to mulch 50 ft2 one foot deep, requires 2 cubic yards of mulch, or about a pickup truck full).
The ideal time to begin sheet mulching for springplanting is the previous fall so that the mulch has a chance to begin breaking down, killing the grass below and feeding the life in the soil. There is no ‘right’ sheet mulch recipe. Rather think of it as more of an concept. Generally, there are four distinct layers used in sheet mulch. Use whatever materials you have access to - be creative and see what’s abundant and free. To begin, mow the existing grass as low as possible. Then thoroughly wet the area with a garden hose or wait for a rain. If the soil is already damp, skip this step. If you plan to plant any large trees or shrubs, do so before you begin mulching as it is much easier to mulch around them.
• Layer 1 consists of ‘Concentrated Compost’. Up to 6” thick, this layer is made up of material that is high in nitrogen and potentially contaminated with weed seeds. This nitrogen boost works to stimulate soil life and jump-start the decomposition process. Manure, yard waste, food scraps all work well. If working with heavy clay soils, use a pitchfork or Ubar to break up and aerate them. This is also the time to add any necessary amendments (dolomite, lime for acid soils, gypsum for heavy clays, etc).
• Layer 2 is the ‘Weed Barrier’. 4 to 6 sheets of newspaper (non-glossy), a layer of cardboard, burlap bags, etc. all work well. Overlap sections along seams by at least 6” to prevent weeds from penetrating. Thoroughly wet it down to speed up decomposition and prevent it from being blown away.
• Layer 3 is the ‘Compost Layer’. Generally 3-5” thick, use fully-decomposed compost, straw, grass, leaves or any other weed-free organic material.
• Layer 4 is the final ‘Top Layer’. Again use a high carbon, weed-free material such as straw, leaves, wood chips, bark or sawdust. This layer will need to be repeatedly renewed as it decomposes. And finally, you’re mulched and ready to garden! Because sheet mulch acts to develop rich, living topsoil, avoid walking on your garden beds - instead create pathways that provide comfortable access. When it comes time to plant into your mulch, create a small hollow, fill it with topsoil and plant your seed or seedling directly into it. If you wish to sow seeds, add a thin layer of compost to the mulch’s surface and broadcast seeds onto it. Finally, take care to keep the mulch away from the base of plant stems as mold, slugs and rodents can cause considerable damage to plants and young trees.
 Happy gardening!!


Wednesday, March 13, 2013

Ten Easy Steps For Starting A Garden

Step 1- decide what you would like to grow. Herbs? Vegetables? Flowers? Whatever!
Step 2- pick a spot! Depending on what you might decide to grow is how you should pick a spot. For example-- . Almost all vegetables and most flowers need about six hours of full sun each day. Pick a spot where you think will get the most sun during the day.
Step 3- Clear the ground! Get rid of the sod covering the area you plan to plant. For quick and easy just clear everything out of the way and the spread some compost to make the gorund nice.
Step 4- Improve the soil. Invariably, soil needs a boost. The solution is simple: organic matter. Add a 2- to 3-inch layer of compost, decayed leaves, dry grass clippings, or old manure.
Step 5- Dig. Digging loosens the soil so roots can penetrate more easily. But digging when the soil is too wet or too dry can ruin its structure. Dig only when the soil is moist enough to form a loose ball in your fist, but dry enough to fall apart when you drop it.
Step 6- Pick your plants- look through magazines, go into shops do whatever you want to help pick what plants you would enjoy!
examples--- a few easy-to-grow plants for beginners. Annual: cosmos, marigolds, impatiens, geraniums, Calendula, sunflowers, and zinnias. Perennials: Russian sage, lamb's-ears, black-eyed Susans, purple coneflowers, phlox, pansies, and daylilies. Vegetables: lettuce, peppers, tomatoes, and cucumbers.
Step 7- Put them in the ground.
Step 8- WATER- Seedlings should never dry out, so water daily while they are small. Taper off as the plants get larger.
Step 9- Mulch. To help keep weeds out and water in, cover the soil with a couple of inches of mulch. Mulch is no needed but it does help keep plants healthy and well watered!
Step 10-Keep it up. Your garden is on its way. Keep watering when needed, and pull weeds before they get big. Fertilize with a dry fertilizer about halfway through the season.

Sunday, March 10, 2013

7 Insects You Actually Want In Your Garden

1. Lady Beetles

 
Benefits Of Having Them In Your Garden: They eat aphids and other softbodied pest eggs, scales and whitefly nymphs.
Bait Them With: Asters, marigolds, cosmos, cilantro, yarrow, dill, cabbages, sweet alyssum, flowering kale.


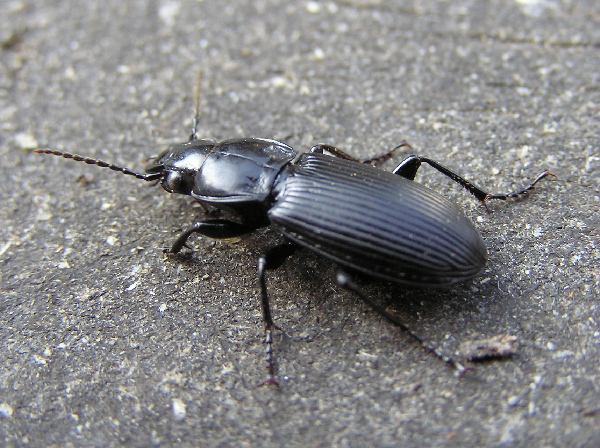
2. Ground Beetles

Benefits Of Having Them In Your Garden: They will destroy slugs, snails, cutworms, flys and rootmaggot eggs and larvae.
 Bait Them With: Sweet or white clover and other ground covers; also use mulch to provide habitat.


3. Hoverfly

Benefits Of Having Them In Your Garden: Maggots eat softbodied pests such as aphids.
Bait Them With: Feverfew, lavender, sweet alyssum, candytuft, dill, fennel, asters.


4. Lacewings

Benefits Of Having Them In Your Garden: Their larvae prey on pest eggs, aphids, scales and small caterpillars.
Bait Them With: Most pollen and nectar flowers, dill, daisies, fennel, angelica.


5. Aphid Midges

Benefits Of Having Them In Your Garden: Immature insects feed on many species of aphids.
Bait Them With: Nectar-rich flowers and herbs, including Queen Anne’s lace, dill, mustards.


6. Parasitic Wasps

Benefits Of Having Them In Your Garden: They act as parasites by laying eggs in caterpillar and aphid larvae.
Bait Them With: Dill, mint, sage, thyme, lavender, coriander, Queen Anne’s lace, sunflowers.


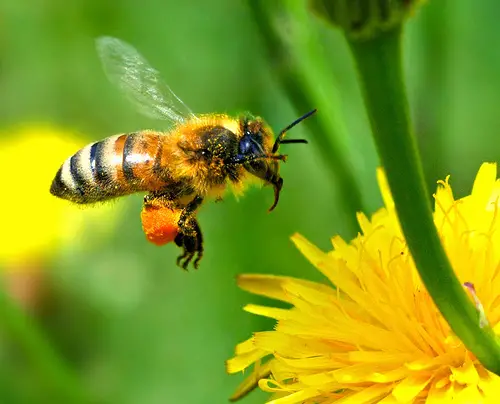
7. Bumblebees, Honeybees, Mason Bees

Benefits Of Having Them In Your Garden: They pollinate food crops.
Bait Them With: Orchard fruits, mustards, cress, wildflowers, clover, blueberries, hollyhock.


Thanks to Reader's Digest for the great information once again, for more great tips and tricks check out: http://www.readersdigest.ca/


Saturday, March 9, 2013

How To Keep Animals Out Of The Garden: The Natural Way

Note that many of these solutions will work for deer, raccoons, coyotes, rabbits, and various varmints as well.


1. Build Raised Beds. You don’t have to build formal raised beds, but even if you mound up the dirt, it confuses them.   Sloped beds are a further deterrent.
 
2. Create Narrow Pathways Between the Beds. If you think about it from a rabbit’s perspective, there are these mounds about 1.5 to 2 feet tall. If I were a rabbit and tried to hop between those mounds, I’d be a sitting duck for any cat or coyote standing on the mound. No way, not worth it! 


3. Mulch.  Mulch deters deer, rabbits, gophers, moles, voles… It seems to work. Straw mulch works great, it’s cheap and plentiful, and eventually it will decompose and become plant food.

 
4. Interplant. Again from the rabbit’s perspective, I am hopping around finding a nice clover patch here, another one way over there, and then… wow, a whole row of tender, organic greens all to yourself. But, if that row is interplanted with things I don’t like – like onions – suddenly, maybe it’s not worth it to me. This goes for all sorts of pests, including aphids, powdery mildew, voles, and so on. 
 

5. Plant a Perimeter of Things They Don’t Like. Garlic, onions, chives, catnip, lavender, and marigolds are all deterrents according to several sources. The Old Farmer’s Almanac recommends planting a double row of onions. You could also try a low, dense hedge. 


6. Build a Fence Around the Beds, or Around the Plants. You probably want to build a fence at least 2 feet high. It can be made out of a number of materials, so you can make it quite attractive: bamboo, chicken wire, wood, wire mesh will all work. If you don’t have raised beds, you should dig a trench at least 6-8″ below ground, and start the fence there. If you’re using a bendable material, bend it outward for added benefit. Rabbits (and voles, moles, etc) can burrow, so you want to cover above and below ground. 


7. Put a layer of mesh or other material over the hardest hit plants. You can use wire mesh, burlap, or hardwire cloth for this. You can build a loop-wire tunnel as well.


8. Try Other Alternatives. Fake snakes or owls, soap flakes, sulfur, blood meal, wind socks, human hair, motion-sensor sprinklers, a mostly buried bottle, dog, coyote, or fox urine, and cat litter are some. There are also some store-bought remedies,  try some of these cheaper, organic, and sustainable methods first. (Note cat litter should not be put in the vegetable garden, only on the perimeter, to avoid consuming potentially harmful bacteria.) Have fun!

 
9. Plant Clover and Other Bunny Favorites in Another Area of the Yard. This is the decoy effect: if you feed them well with their favorite foods, they won’t need to eat your veggies. What do bunnies like? Goldenrod, wild strawberries, clover, dandelions, wildflowers, alfalfa, and long grass.


10. If All Else Fails, Plant Extra for the Rabbits. They need to eat, too, and goodness knows we have altered their world by putting up roads and houses where they used to graze happily. Why not give them a little bit of extra food to survive in their human-altered environment?


Thursday, March 7, 2013

Why Grow Your Own?

In a world where we are becoming increasingly suspicious of the massproduced food on offer, growing our own vegetables is a fundamental way to reconnect with our food. 'You are what you eat' may be an old adage, but it makes a very topical, valid point. When you grow your own vegetables, you know exactly what's in them - plus, in the recession, it is a great way to get healthy, fresh food for next to nothing.

HOW MUCH SPACE WILL I NEED?
THE first big question from people is always: 'Will I have room?' And the answer is always: 'Yes.' It is perfectly possible to grow vegetables in anything from a window box or tub to a raised bed. It is not essential to have a large greenhouse or acres of land. A small area means you can grow small numbers of lots of different crops.

FIRST, TAKE A LOOK AT THE SOIL
Before you decide what to grow, you need to know a little bit about your patch of soil. Vegetables grow best in slightly acidic soil with a pH of 6.5 (neutral is pH 7). You can pick up a soil test kit from all good gardening stores from as little as 3$ - the testing solution will turn orangey-yellow if the soil is acid, green if it's neutral and dark green if its alkaline. If the soil is too acidic, mix in garden lime (finely ground chalk or limestone you can pick up at most garden centres) to raise the pH. You also need to check that your soil is not too sandy or is too high in clay, and that your patch is well drained. To do so, fill your growing area with water, and if the water is still there the next day, the drainage is too poor. Line tubs with broken pots or bricks and add sand to high clay soil to improve drainage.

DECIDING WHAT TO GROW
It is easy to get carried away looking through seed and plant catalogues, but it is best to keep experiments to a minimum and grow only what you really like. Ignore anything too big for your space or anything that needs elaborate preparation such cabbages, which are slow to mature and take up precious space all season. Consider dwarf varieties such as dwarf leeks and aubergines rather than rambling crops, and make the most of walls and fences for growing climbers such as beans and peas. Also, try growing vegetables and herbs that are ornamental as well as edible such as unusual lettuce and salad leaves in dark greens and purples, carrots with feathery tops or dark red basil - vegetables don't have to be dull.

PREPARING YOUR PLOT
If you want the maximum amount of fresh produce from a small garden, consider raised beds (a 4ft square wooden frame about 6in high and filled with soil on top of your existing soil patch). It is not only easier to tend, but the soil dries out and warms quicker and can produce better yields, plus, the increased growing depth is perfect for root vegetables.
Ideally your plot should be next to a sunny wall or fence - perfect for climbing plants. Just remember that soil in the 'rain shadow' of a wall can be dry, so add manure or compost to help retain moisture every time you replant. Make sure your plot is weed-free to begin with by digging it over, and remove weeds by hand. Before you start growing, improve your soil with organic fertilisers if possible - as a rough guide, add one bucket full of well-rotted material to every square yard of your plot.

GET YOUR KIT TOGETHER
Having the right tools will make growing vegetables much easier and leave you with more time to enjoy the end results. Your ideal starter kit should include a spade, a fork, a pair of secateurs, a hoe, a trowel or hand fork, a rake, a watering can or hosepipe, some good boots and gardening gloves. Spend as much as you can afford on quality tools that will last.

GET READY TO GROW
When planting your crops, you need to decide whether you are going to grow from seed or from plug plants bought from your local nursery or garden centre. It is a lot less effort - and less risky - to buy young plants, but it can be fun to experiment with growing from seed inside your home or greenhouse (carrots, celeriac and lettuce are great ones to try) and transferring the seedling to your plot. Tend your patch well and in a matter of several weeks you will be eating your own freshly picked veg.

Tuesday, March 5, 2013

5 Secret DIY Plant Food Solutions

1. Try Matchbooks as Fertilizer


Matchbooks as fertilizer? Yes! But only when you want to add sulfur to the soil to lower the pH for acid-loving plants. Tear out the matches from several matchbooks and toss them into the bottom of planting holes for impatiens, hydrangeas, azaleas, and gardenias.

2. Turn Your Fireplace into Fertilizer

Hardwood ashes from your fireplace will supply potassium and phosphorous to garden plants. Just make sure not to use wood that has been treated with preservatives or anything else. To fertilize plants, spread a half-inch layer of ashes a few inches from the stem and dig it into the soil.
A couple of caveats:
1) If you store ashes outside, protect them from the rain or their nutrients will be depleted;
2) don't use ashes around potatoes, since ash can promote potato scab.

3. Limit Your Plant's Coffee Consumption

It isn't the caffeine in coffee grounds that garden plants like azaleas and rosebushes and evergreens love but rather the acidity and aeration the grounds provide — not to mention nitrogen, phosphorous, and trace minerals. Just be sure to dig the grounds into the soil to keep them from becoming moldy.
How much to use? Dig about ¾ cup of grounds into the soil near the roots, repeating once a month. And don't overdo it. Fertilizing even acid-loving plants with coffee grounds too frequently could increase soil acidity to undesirable levels.

4. Add Sawdust and Leaves to Aging Manure

Fresh, or raw, manure must be aged so that it won't burn your plants' roots — and only the most committed home gardeners will wait for the six months it takes. If you're one of those gardeners, water a fresh manure pile, cover it with a tarp so the nutrients won't leach out during a rain, and turn the pile with a pitchfork every 10 days or so. To control the odour (especially in summer), add sawdust, dead leaves, or wood chips, forking them evenly into the pile.

5. Try a Drill for Tree-Feeding

To make sure fertilizer reaches a tree's feeder roots, put your power drill to work on something besides wood: the soil. Use a bit at least 1 foot long and 1½ inches in diameter, and bore holes in the soil around the drip line — the imaginary circle beneath the outermost tips of the tree canopy. Space the holes about 2 feet apart, then bore a second ring of holes about 2½ feet from the tree trunk. Funnel a slow-release fertilizer into all of the holes, and then plug them with soil and water well.

Information provided by: Reader's Digest Canada
For more tips and tricks visit their website at: http://www.readersdigest.ca/

Monday, March 4, 2013

Tips And Facts For Natural Gardening

1- Organic fertilizers are safer than chemicals.

2-Don't use garden soil as potting soil in containers. Its quality and texture is variable; it may drain poorly or be too loose and drain too quickly. It is also more likely to contain diseases, weed seeds and insects.

3-Once a seed sprouts it must be kept watered. If it dries out, it dies. If seeds are lightly covered with soil, they may need to be gently sprinkled with water once or twice a day to keep them moist.

4-Use newspapers as weed barriers when creating a new bed. They are printed with soy ink and decompose nicely, and are simple to lay out again when decomposed. Don't use slick colored advertisements or colored pages .

5-Coffee grounds make excellent mulch around acid-loving plants.

6-The longer the growing season, the more compost is needed in the soil.

7-A longer growing season requires more nutrients and organic matter in the soil.

8- Prepare beds for annuals and small plants by working in plenty of organic material, layer mulch on top, then gently stick the transplants through mulch to the appropriate depth.